

Key Takeaways
An OBD2 scanner is a useful starting point, but the code is evidence rather than a final diagnosis. Careful recording, testing, and verification matter as much as the scan itself.
- Confirm that the scanner supports your vehicle before connecting it.
- Record stored, pending, permanent, and freeze-frame information.
- Treat a fault code as a clue, not proof that a named part has failed.
- Inspect power, wiring, connectors, and grounds before replacing components.
- Clear codes only after the repair, then complete a drive cycle and rescan.
Understand what an OBD2 scanner can diagnose
An OBD2 scanner communicates with one or more vehicle control modules through the diagnostic port. It can reveal stored information that is not visible from the warning light alone, including diagnostic trouble codes and, on compatible vehicles, operating data. The exact depth of the scan depends on the vehicle and the tool.
The role of the ECU in vehicle diagnostics
The ECU receives information from sensors, compares that information with expected operating conditions, and controls systems such as fuel delivery and ignition. When it detects a condition outside its programmed limits, it may store a diagnostic trouble code and turn on a warning light. The code tells you which monitored condition needs attention, not automatically which physical component to replace.
That distinction keeps a scan useful without making it misleading. A code may point toward a circuit, pressure condition, misfire, or emissions-related issue while the actual cause is a loose connection, damaged wire, air leak, or power problem.
Difference between generic and manufacturer-specific fault codes
Generic codes use definitions shared across vehicle manufacturers, while manufacturer-specific codes add information that may require the maker’s service data. A reader that displays only a short description can therefore be less useful than one that also provides the complete code and supporting conditions. For a second reference, a fault-code definitions guide can help explain the structure of common DTCs.
The safest habit is to preserve the exact code before searching for a fix. Include every character, note whether it is pending or confirmed, and record the vehicle’s make, model, engine, and year when seeking further information.
Systems commonly accessed through the OBD2 port
Most drivers begin with powertrain codes because these commonly relate to the engine, transmission, emissions, or the check-engine light. Depending on vehicle support and scanner capability, the port may also provide access to chassis, body, or network-related modules. Coverage is never universal, so a full vehicle scan may show more than a basic engine-code read.
A scanner comparison guide is useful when you want to compare the kinds of information different tools provide before buying one. For phone-based work, Car Scanner ELM OBD2 is described as providing fault-code information and real-time parameters through a compatible ELM327 connection.
When an OBD2 scanner cannot identify the root cause
A scanner reports what the control module observed; it does not physically inspect a broken wire, blocked passage, weak ground, or mechanical fault. A code can also be triggered by a problem elsewhere in the system. If the vehicle is running badly, overheating, losing oil pressure, or showing a serious warning, stop and assess the safety issue rather than relying on the scan alone.
Think of the result as the first branch in a diagnostic process. The next step may be a visual inspection, a voltage test, a smoke test, a pressure test, or manufacturer-specific service information.
Choose the right OBD2 scanner for ECU fault codes
The right scanner depends on the depth of diagnosis you expect to perform and the vehicles you work on. A simple reader can be enough for checking a check-engine light, while a more capable tool may show live data, access several modules, and guide you through service functions. Cost matters, but compatibility and useful data matter more.
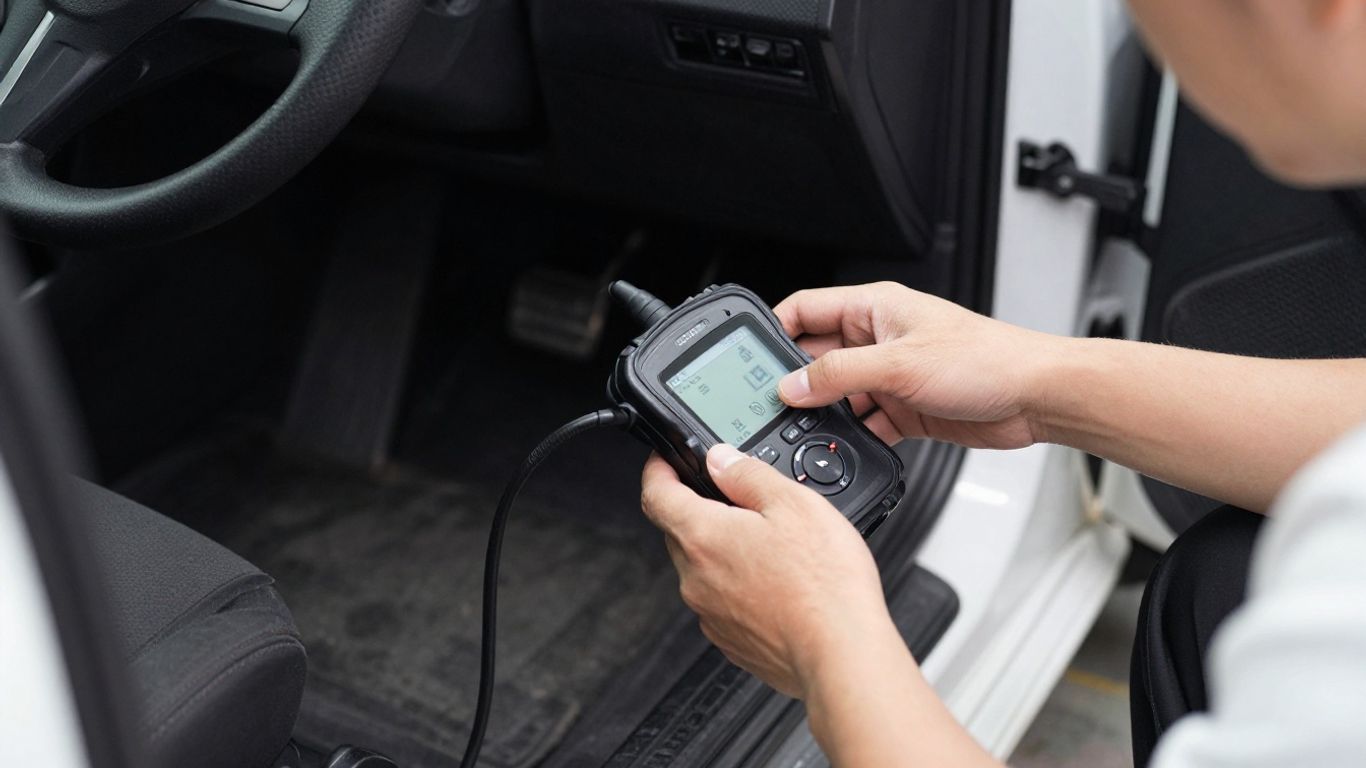
Basic code readers versus advanced diagnostic scanners
Basic readers generally focus on reading and clearing engine-related trouble codes. Advanced scanners may support more modules, broader vehicle coverage, live data, and additional service functions, but those capabilities vary by model and subscription. Choose based on the jobs you actually expect to handle rather than buying the longest feature list.
For example, TOPDON diagnostic tools are described as offering advanced service functions, wireless connectivity, and broad coverage for modern automotive repair. That description does not mean every tool supports every vehicle, so the individual model’s coverage still needs checking.
Wired, Bluetooth, and Wi-Fi connection options
A wired scanner is usually straightforward: plug it in and follow the screen prompts. Bluetooth and Wi-Fi adapters can work well with a phone or tablet, but they add pairing, permissions, and app-compatibility steps. Wireless convenience is valuable when you want to watch live data from outside the driver’s seat, provided the connection stays stable.
Keep the phone charged and avoid switching between several wireless accessories during a scan. If a connection drops, save what has already been recorded before restarting the session.
Live data, freeze-frame, and readiness monitor features
Live data shows current readings while the engine operates, whereas freeze-frame data captures conditions at the moment a code was set. Readiness monitors indicate whether the vehicle’s self-tests have completed, which is particularly relevant before an emissions inspection. These features help you move beyond simply asking what code appeared.
A useful tool should let you save or review the information later. That makes it easier to compare readings before and after a repair rather than relying on memory.
Vehicle compatibility and software update requirements
Check the scanner’s supported makes, models, years, protocols, and modules before purchase. Some features depend on software updates, an active subscription, or a specific adapter, and older vehicles may not provide the same data as newer ones. Compatibility information is more reliable than assuming that every sixteen-pin port offers identical access.
If you regularly work across Melbourne, Sydney, Brisbane, or other locations with different customer vehicles, broad coverage may be more useful than a tool optimized for one car. Keep the tool updated and retain the vehicle identification details for each scan.
Prepare your vehicle and connect the scanner
Preparation prevents many apparent scanner faults. Park safely, switch off unnecessary electrical loads, and have the vehicle identification information ready. The scan should be treated as a controlled test, not something to perform while the vehicle is moving.
Finding the OBD2 port safely
The OBD2 port is usually beneath the dashboard near the steering column, although its exact position varies. Use a torch if necessary, and do not force the connector into place. The pins should align easily; a damaged or contaminated port may need attention before any diagnostic tool can communicate reliably.
Keep your feet clear of pedals and avoid placing the scanner where it could interfere with driving controls. If access is awkward, use a stable position rather than pulling on the cable.
Checking battery voltage and ignition settings
A weak battery can interrupt communication or create misleading low-voltage codes. Before scanning, check that the battery terminals are secure and that the vehicle has enough charge for the session. Follow the scanner’s instructions for whether the ignition should be on with the engine stopped or running.
Do not start the engine unless the procedure calls for it. Some tests require ignition-on, engine-off conditions so the modules wake up without introducing changing engine data.
Pairing a wireless scanner with a phone or tablet
Install the compatible application before connecting the adapter, then grant only the permissions it needs for communication. Plug in the adapter with the ignition off if instructed, turn the ignition on, and select the adapter from the app’s connection menu. A stable pairing should be confirmed before you begin reading codes.
OBD Auto Doctor is described as connecting to an ELM327 dongle and providing code reading, code clearing, readiness information, and live sensor data. Those functions still depend on the adapter, vehicle, and app compatibility.
Avoiding connection problems during the scan
Keep the vehicle’s battery supported if the scan is long, especially when several modules are being queried. Do not unplug the adapter while data is being written or a service routine is running. Close other apps that may try to use the same Bluetooth connection.
If communication fails, record the exact message, cycle the ignition as directed, and inspect the connector. Trying a different adapter without checking power or compatibility can hide the original problem rather than solve it.
Scan for ECU fault codes and record the results
Once connected, begin with a complete scan if the tool supports it, then save the results before clearing anything. A complete record gives you a baseline and may reveal relationships between codes that appear unrelated at first. Take note of warning lights, drivability symptoms, and when the problem began.
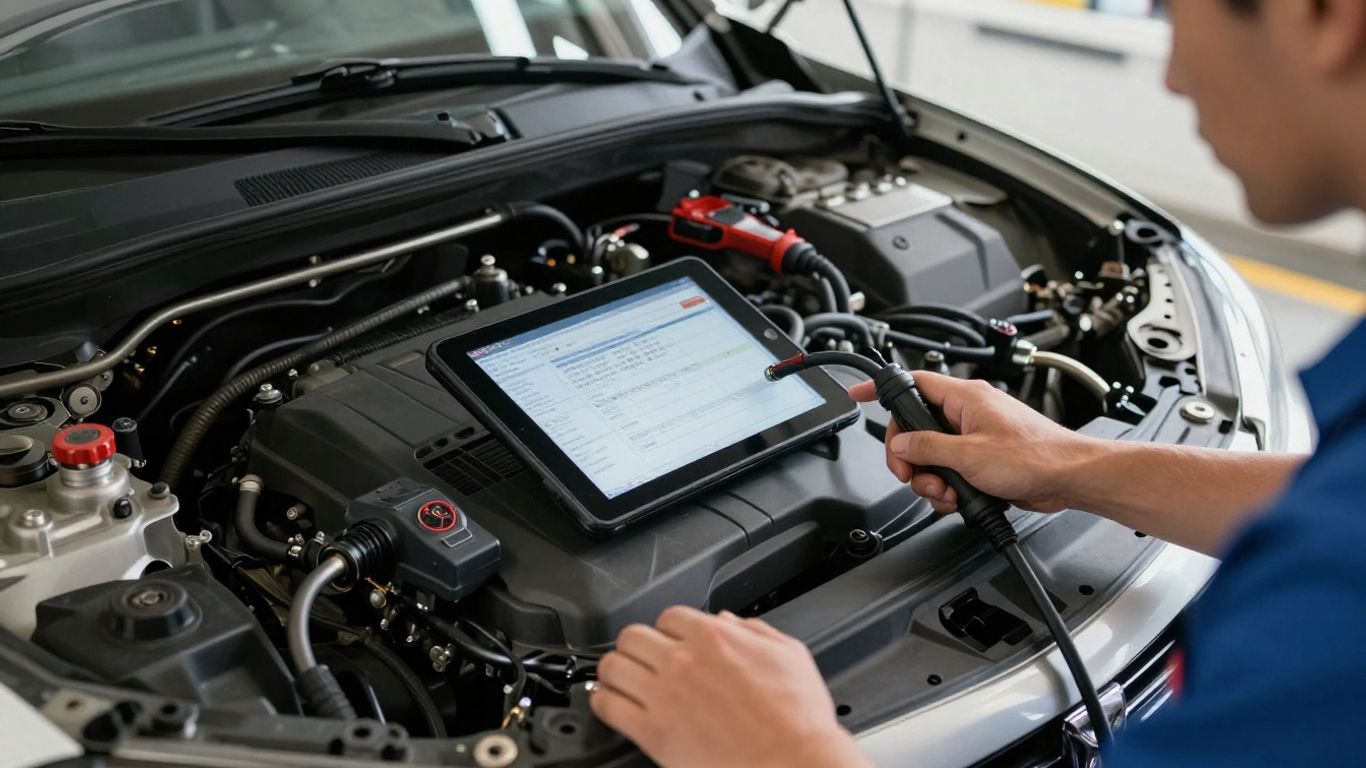
Running a full diagnostic scan
Select the vehicle accurately and allow the scanner to identify available modules. A full scan can take longer than an engine-only check, but it may reveal communication or chassis information that helps explain the main symptom. Keep the ignition stable and do not operate the vehicle during the scan.
Save a report or photograph the screen before moving to any erase function. If the tool gives a choice between a health report and individual module scans, capture both when practical.
Reading stored, pending, and permanent codes
Stored or confirmed codes indicate that a fault met the module’s criteria, while pending codes may reflect an issue detected during fewer monitoring events. Permanent codes can remain after a repair until the vehicle completes the relevant self-tests. Their presence does not necessarily mean the fault is active at that exact moment.
Keep these categories separate in your notes. A pending code can become confirmed, disappear, or help identify an intermittent issue when compared with later scans.
Saving freeze-frame data and live sensor readings
Freeze-frame data may include engine speed, temperature, load, and other conditions captured when a code was recorded. Save it before clearing codes because it can disappear afterward. Live readings are most useful when compared with normal operating conditions and the symptoms you can reproduce.
Do not collect every available parameter without a purpose. Choose readings connected to the code, record the conditions under which they were taken, and compare them consistently.
Identifying code descriptions without assuming a failed part
A code description often names a system or condition rather than a replaceable component. For instance, a sensor-circuit code may result from the sensor, its wiring, a shared reference voltage, or a poor ground. The description narrows the investigation; it does not finish it.
The code is a starting point, so confirm the circuit and operating conditions before ordering a part. This approach is particularly useful when a vehicle owner is trying to find a suitable replacement part without wasting money on an unrelated component.
Interpret OBD2 fault codes accurately
Reading the characters in a DTC gives you a structured first impression. The first letter identifies the broad vehicle area, while the following digits provide information about whether the code is generic or manufacturer-specific and which system is involved. Interpretation becomes stronger when the code is considered alongside the vehicle’s symptoms and history.
Using the first letter and digits to understand a code
P generally refers to powertrain, B to body, C to chassis, and U to network communication. The remaining characters refine the category and identify the particular fault description. Not every scanner explains every digit equally well, so keep the complete code visible when researching it.
A code’s format is helpful because it prevents a random parts search. It tells you where to begin looking, then testing determines what has actually failed.
Comparing generic P0 codes with manufacturer-specific codes
Generic P0 codes have broadly shared meanings, while manufacturer-specific codes may require information for that particular vehicle. Even a familiar-looking code can have different diagnostic procedures across engines and model years. Use the vehicle’s service information when the scanner’s short definition leaves uncertainty.
A reliable reference can explain the code family, but it cannot replace measurements on the vehicle. Be cautious with advice that jumps directly from a code to a guaranteed repair.
Evaluating related codes as a group
Several codes appearing together may share a power supply, ground, harness, or operating condition. For example, multiple sensor faults that arrive at the same time can point toward a common circuit problem rather than several failed sensors. Record the order and status of the codes whenever the scanner provides that information.
A simple comparison table can keep the investigation organized:
| Code status or pattern | What it may tell you | Useful next step |
|---|---|---|
| One confirmed code | A monitored condition met its threshold | Test the related circuit and conditions |
| One pending code | The issue may be intermittent or not yet confirmed | Rescan and compare operating conditions |
| Several related codes | A shared supply, ground, or system issue is possible | Check common wiring and power sources |
| A communication code | Modules may not be exchanging data correctly | Inspect network connections and voltage |
The table is a guide for prioritizing tests, not a substitute for the vehicle’s wiring diagram. Start with patterns that could explain several codes at once.
Combining scan results with symptoms and service information
A scan result should make sense beside the driver’s complaint, recent repairs, maintenance history, and conditions under which the fault appears. Service information can provide pinouts, specifications, test procedures, and drive-cycle requirements. If those sources disagree, pause before replacing anything.
Clear notes also help a parts supplier or technician identify the correct application. The more precise the vehicle and fault information, the less likely a rushed purchase will create another mismatch.
Diagnose the underlying vehicle problem
Diagnosis begins after the code has been framed as a testable question. Ask what must be true for the code to set, then inspect and measure those conditions. A careful process is usually cheaper than replacing several plausible parts in sequence.
Inspecting wiring, connectors, fuses, and grounds
Start with a visual inspection of the affected circuit. Look for loose terminals, corrosion, chafed insulation, melted connectors, damaged fuses, and grounds that are dirty or loose. A connector can look attached while still making poor electrical contact.
Use the wiring diagram when available, and compare the circuit with the code’s stated conditions. Repairing a damaged connection may solve the fault without replacing a sensor or control module.
Testing sensors and actuators with live data
Live data can show whether a sensor responds when the relevant condition changes, but the reading must be compared with specifications and with a known-good operating pattern. Actuators may need an activation test or a direct electrical measurement. Avoid probing terminals in a way that spreads or damages them.
A useful sequence is to verify power and ground, check the signal, and then test the component under the conditions where the fault occurs. One unusual reading is a clue to investigate, not automatic proof of failure.
Distinguishing low voltage from component failure
Low system voltage can produce several apparently unrelated codes and interrupt communication between modules. Check battery condition, charging voltage, terminal security, and grounds before condemning a control unit. If the vehicle has recently been jump-started or the battery replaced, include that history in your notes.
This is where a broad scan helps: a common voltage-related pattern is often more informative than one isolated code. Correct the supply problem first, then rescan to see which faults remain.
Knowing when professional diagnostic equipment is necessary
Professional help is sensible when the fault involves airbag systems, advanced driver assistance systems, immobilizers, network communication, or a repair requiring coding or calibration. It is also appropriate when the vehicle is unsafe to drive or the available information does not support a confident test.
When choosing assistance, ask about diagnostic fees, data access, authorization, and whether the provider has experience with the vehicle. Guidance on evaluating computer repair services is not automotive-specific, but its emphasis on clear communication and handling customer data is a useful general principle. For broader operational technology decisions, managed IT services guidance likewise illustrates why scope and service expectations should be agreed in advance.
Clear codes and verify the repair
Erasing codes is the final part of the process, not the first. Before clearing anything, save the scan, freeze-frame information, and notes about the original symptoms. Then make sure the repair addresses the tested cause rather than only the visible warning light.
When it is safe to erase ECU fault codes
Clear codes after the repair has been completed and after you have confirmed that no safety-critical issue remains. If you are preparing for an emissions inspection, remember that erasing codes also resets readiness monitors. A vehicle may need time and specific driving conditions before those monitors run again.
Do not erase codes simply to make the dashboard look normal. Keeping the original record gives you a baseline if the warning returns.
Why clearing codes does not fix the problem
The erase command removes stored information; it does not repair wiring, restore pressure, replace a failed component, or correct a mechanical problem. If the underlying condition remains, the code may return immediately or after the system performs its next test. In some cases, the vehicle may continue to drive while the fault remains undetected temporarily.
Treat a cleared warning as an unconfirmed result until the vehicle has been tested under appropriate conditions. The absence of a light immediately after clearing is not proof of success.
Completing a drive cycle and checking readiness monitors
A drive cycle gives the ECU opportunities to run its self-tests. The exact sequence varies, so follow the vehicle’s service information rather than assuming one universal route. Monitor coolant temperature, speed, stop-and-go conditions, and time only when it is safe and lawful to do so.
Check readiness monitors after the cycle. If they remain incomplete, the vehicle may simply need more suitable operating conditions, or a continuing problem may be preventing the test from finishing.
Confirming that the fault does not return
Rescan after the verification drive and compare the result with the original record. The code should remain absent, the symptom should be resolved, and the relevant monitor should complete when applicable. If the fault returns, do not keep clearing it; revisit the test results and inspect the circuit again.
A well-documented repair leaves you with more than a dark warning light. It gives you a repeatable explanation of what failed, what was repaired, and why the vehicle is now operating normally.
Conclusion
An OBD2 scanner for ECU fault codes can turn a vague warning light into a structured investigation. Use it to collect evidence, test the likely causes, and verify the repair, while recognizing when the vehicle or system requires professional equipment and deeper service information.
Frequently Asked Questions
Can an OBD2 scanner tell me exactly which part is faulty?
Usually not. It identifies a monitored fault or system condition, and further inspection and testing are needed to confirm the failed component.
Should I clear a code before diagnosing the vehicle?
No. Save the code, status, freeze-frame data, and symptoms first. Clearing too early can remove useful evidence.
What is the difference between a stored and pending code?
A stored code has generally met the module’s criteria for recording a fault, while a pending code may be an early or intermittent detection that has not yet been confirmed.
Why did the warning light return after I cleared it?
The underlying problem may still be present, or the same fault may have reappeared when the vehicle repeated its self-test under similar conditions.
Can a weak battery cause fault codes?
Yes. Low voltage or poor battery connections can create communication problems and several misleading codes, so voltage and grounds should be checked early.
How long does it take for readiness monitors to reset?
It depends on the vehicle and the monitor. Some require specific temperatures, speeds, and driving conditions, so follow the manufacturer’s drive-cycle guidance.
When should I stop driving and seek professional help?
Stop when the vehicle has unsafe handling, overheating, low oil pressure, severe misfiring, brake or airbag warnings, or another symptom that could cause damage or injury.