

Key Takeaways
A reset can be part of finishing a repair, but it is not a substitute for diagnosing the cause of a fault. Follow the vehicle-specific procedure and verify the result afterward.
- Record trouble codes and freeze-frame information before clearing anything.
- Use the reset method specified for your vehicle and repair.
- Do not disconnect the battery unless service information supports that method.
- Complete any required relearn or readiness-monitor drive cycle.
- If a warning light or symptom returns, investigate the underlying fault.
When an engine computer reset is needed after a repair
Resetting engine computer after repair may be appropriate when the repair instructions call for clearing diagnostic codes or resetting learned values. The right step depends on the vehicle, the fault, and what was replaced or adjusted. A reset is not a universal finishing step, and clearing information too soon can make diagnosis harder. First establish what the repair procedure actually requires.
Repairs that may require clearing codes or adaptive values
A repair involving a failed sensor, an emissions component, or an engine-control part may leave stored codes that need to be cleared after the fault is corrected. Some procedures also call for resetting learned values so the system can adapt to a repaired or replaced component. These are separate actions: clearing diagnostic trouble codes does not necessarily reset adaptations, and resetting adaptations is not always necessary. Use the instructions for the specific repair rather than assuming every new part needs a computer reset.
When a reset is unnecessary or could cause problems
If no repair procedure calls for a reset and the vehicle has no relevant stored code, leaving the computer alone is often the better choice. Clearing information before recording it can erase clues that help identify an intermittent fault. It may also reset readiness monitors, which can take normal driving to complete again. Preserve the evidence first whenever the cause of a warning light or symptom is not fully understood.
How the ECM, ECU, and PCM terms differ
These abbreviations are used inconsistently in everyday conversation and even vary by manufacturer. ECM often means engine control module; ECU is a broader term for an electronic control unit; and PCM commonly refers to a powertrain control module. A vehicle may have several control modules, so the label alone does not tell you which unit or function a procedure addresses. Check the service information for the vehicle rather than relying on a generic description.
Why a reset does not fix an underlying fault
A reset can clear stored information or learned values, but it cannot repair a loose connector, damaged wire, failed component, vacuum leak, or other physical problem. If the same condition remains, the computer may detect it again and turn on the warning light. A reset that temporarily changes how the vehicle behaves is not proof that the repair succeeded. Treat recurring codes as information to investigate, not as a reason to keep clearing them.
Prepare before resetting the engine computer
A careful reset starts with a quick review of the repair and the data already available. Confirm that the original fault has been addressed, then check whether the vehicle maker specifies a particular sequence. This preparation can prevent lost diagnostic information and avoidable trouble with settings or battery power. It also makes it easier to tell whether the repair worked.

Confirm the repair is complete and inspect connectors
Before connecting a scan tool, make sure the repair is finished and the relevant parts are installed correctly. Check nearby wiring, plugs, grounds, and hoses that may have been disturbed during the work. A connector that is not fully seated can recreate the original fault, even if the replacement part is sound. If anything looks damaged or loose, correct it before clearing codes.
Record diagnostic trouble codes and freeze-frame data
Write down each stored code and save freeze-frame information before clearing anything. Freeze-frame data can show the operating conditions present when a fault was recorded, such as engine load or temperature, and may help explain a problem that comes and goes. Keep the information with the repair notes so it is available if the warning returns. Good service records are useful in many fields; a separate guide to biomedical equipment service discusses maintenance records and repair follow-up in clinical settings.
Check the vehicle’s service information for reset procedures
Consult the repair instructions or service information for the exact make, model, year, and engine. Look for directions on clearing codes, resetting adaptations, performing calibrations, and completing any relearn steps. A generic guide to resetting a vehicle computer can offer background, but it cannot replace vehicle-specific instructions. Online pages may also change how titles appear in search; a separate overview of Google titles and descriptions covers that different issue, not vehicle repair procedures.
Protect battery power and electronic settings
Some service procedures require stable battery voltage while a scan tool is connected or a calibration is underway. Follow the specified method for maintaining power, and do not interrupt a process once it begins. Battery disconnection can affect settings such as the clock or radio presets, depending on the vehicle. If settings matter, note them beforehand and check the owner’s manual for any security or initialization steps.
A short pre-reset check helps keep the process orderly. Use it to catch missing information or simple setup issues before proceeding:
- Save the codes and freeze-frame details.
- Confirm the repair and inspect affected connections.
- Read the vehicle-specific reset and relearn instructions.
- Check battery requirements and note settings that may be lost.
Once those points are covered, choose the method that the service information calls for; do not assume that one reset approach works for every vehicle.
Choose the right reset method for your vehicle
The available reset methods vary by vehicle and by the work being completed. A basic code clear may be all that is needed after a straightforward repair, while a special function may require a capable scan tool and a defined sequence. Battery disconnection is not a universal shortcut. When in doubt, follow the manufacturer’s instructions or ask a qualified technician to identify the correct procedure.
Clear codes with an OBD-II scan tool
For many repairs, an OBD-II scan tool can read and clear diagnostic trouble codes. Clearing codes removes stored information from the system, but it does not prove that the original problem is gone. Save the codes and related data first, then clear them only after the repair is complete and the procedure permits it. A code that returns after clearing deserves diagnosis rather than another reset.
Use a manufacturer-specific scan tool for special functions
Some procedures call for functions beyond reading or clearing generic codes. Depending on the vehicle, the repair may require a particular calibration, adaptation reset, or guided relearn. A basic scan tool may not offer the required function, and selecting an incorrect menu option can create confusion or interrupt the work. Confirm the tool and function specified by the repair instructions before starting.
Understand the limits of disconnecting the battery
Disconnecting the battery may clear some stored information on some vehicles, but results are not consistent across makes and models. It can also erase settings, reset readiness monitors, or trigger additional steps when power is restored. Use this method only when the manufacturer’s procedure allows it and you understand its effects. A general guide to driving after a reset explains why normal driving may be needed for readiness monitors to run again.
Avoid unsupported procedures and power interruptions
Do not pull a fuse, disconnect a battery, or use an improvised sequence based on a different vehicle’s instructions. An interruption during a programming or calibration procedure can leave the vehicle in an uncertain state. If the required steps or tool functions are unclear, pause and seek reliable service information rather than experimenting. The right method is the one specified for that vehicle and repair, not necessarily the quickest one.
Reset the computer using a scan tool
A scan tool reset is straightforward only when you know what function is required and have saved the original diagnostic information. The steps below describe a general approach, not a substitute for the vehicle’s instructions. Follow prompts on the tool and any service procedure in the order given. Stop if the displayed options do not match the repair being performed.
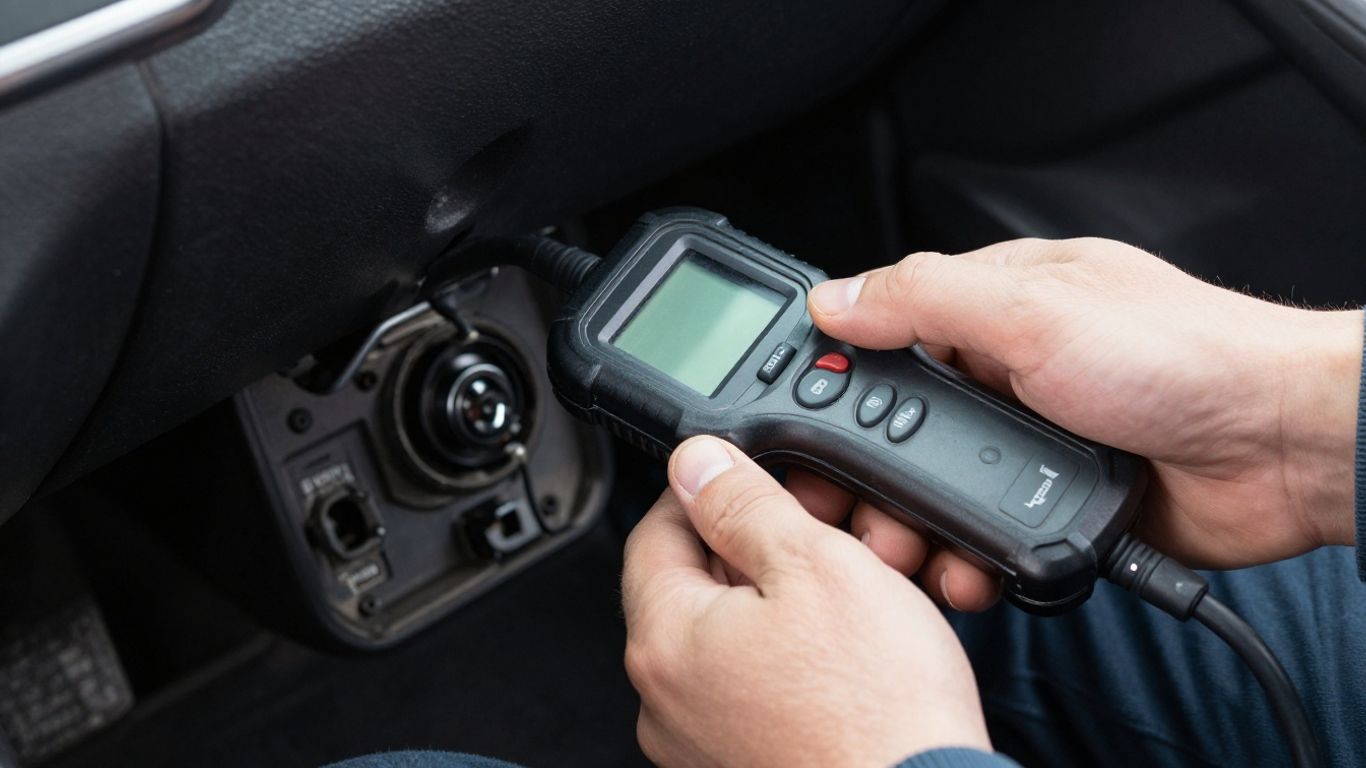
Connect the tool with the ignition in the specified position
Locate the diagnostic connector and connect the scan tool as directed by its instructions. The required ignition position varies: the engine may need to be off, the ignition on, or in another specified state. Do not start the engine unless the procedure says to do so. A stable connection and the correct ignition position help ensure that the tool communicates with the intended system.
Save diagnostic information before clearing codes
Use the tool to retrieve and record current, pending, or other available codes, along with freeze-frame information when supported. If the tool offers a report or save function, retain a copy with the repair notes. This baseline makes it easier to compare the vehicle’s condition after the reset. It can also prevent a useful clue from disappearing before you have had a chance to review it.
Clear codes or reset adaptations only as instructed
Choose the specific function called for in the repair instructions. Clearing trouble codes and resetting adaptations are not interchangeable, so avoid selecting a broader reset simply because it appears in the menu. Read the tool’s confirmation prompt before proceeding, and do not clear information while an unresolved fault remains under investigation. After the action completes, note any message or result displayed by the tool.
Follow prompts for any required calibration or relearn
The scan tool or service procedure may request additional steps after a reset. These might include a calibration or a relearn sequence, but the requirements depend on the vehicle and repair. Follow each prompt in order, including conditions for engine temperature, pedal position, or vehicle state if specified. If the procedure stops or reports an error, record the message and diagnose that issue rather than repeating steps at random.
A visual walkthrough can help make the scan-tool connection and menu sequence easier to follow, provided it matches the vehicle and procedure you are working with.
Complete required relearn procedures
A reset can leave some systems needing time or a specific routine to adapt again. Relearn requirements are vehicle-dependent, so do not substitute a generic idle routine for the instructions in the service information. Some adaptations occur during ordinary use; others require a deliberate sequence. Completing the specified steps helps you assess the repair under the conditions the vehicle expects.
Let the engine idle under the conditions specified by the manufacturer
If the procedure calls for an idle relearn, follow its stated conditions exactly. It may specify a warm engine, electrical accessories switched off, a particular gear position, or a set period of idling. Avoid revving the engine or switching loads on and off unless instructed. If the idle remains unstable or the procedure cannot be completed, check for unresolved faults instead of assuming more idling will fix them.
Relearn throttle, idle, or transmission behavior when required
A throttle, idle, or transmission relearn is not required after every repair. Perform one only when the service information calls for it, and use the tool or sequence specified. The instructions may depend on the part replaced and the vehicle’s configuration. If a relearn is skipped when required, the vehicle may not behave as expected; if it is performed unnecessarily, it may complicate diagnosis.
Restore settings such as the clock and radio presets
After battery power has been interrupted, check the clock and any other settings that may have changed. Radio presets or other saved preferences may need to be restored, depending on the vehicle. Follow any security or setup directions in the owner’s manual. These small checks do not replace the mechanical verification, but they make it easier to notice if the vehicle is still reporting a setup issue.
Allow readiness monitors to run through normal driving
Readiness monitors may need normal operating conditions and drive time before they report complete. Follow the vehicle’s drive-cycle information rather than trying to force the process with aggressive driving. Do not assume the monitors are ready immediately after codes are cleared. If an emissions inspection is approaching, check monitor status with a scan tool and allow for the time the vehicle requires.
Verify the repair and diagnose warning signs
Verification is the last part of the job, not an optional formality. Check whether the original symptom has disappeared and whether the scan tool shows new or returning codes. Pay attention during a safe, normal drive, and stop if the vehicle develops a serious warning or unsafe behavior. A successful reset alone does not confirm a successful repair.
Check for returning codes and warning lights
After the procedure, scan the vehicle again when appropriate and note any stored or pending codes. Watch the dashboard for warning lights as the vehicle is started and driven. A code that returns may point to an incomplete repair, a second fault, or a condition that still needs testing. Record the new information before clearing anything again.
Confirm the engine runs and responds normally
Observe the start, idle, and response to ordinary throttle input in a safe setting. Listen for unusual sounds and notice whether the engine stalls, misfires, or runs roughly. Compare what you observe with the complaint that led to the repair, not just with a general impression that the car feels better. If the symptoms remain, use diagnostic testing to find out why.
Reinspect the repair if symptoms return
If a warning light or symptom comes back, revisit the repair area and inspect the parts, connectors, wiring, and hoses that may have been disturbed. Recheck the stored codes and the conditions under which they appeared. Avoid repeated resets, which can erase useful evidence without correcting the cause. If the repair involved replacing a component, verify that the replacement is correct for the vehicle and installed as directed.
Seek professional diagnosis when the procedure is unclear or unsuccessful
Get help from a qualified technician if the service instructions are unavailable, the scan tool cannot complete the required function, or the warning returns after the repair. This is especially sensible when the vehicle has drivability or safety symptoms, or when a procedure involves programming or calibration. A professional can test the underlying circuit or component rather than guessing from a code alone. Other vehicle reset guides, including resetting an engine control module, can provide general context but should not override the correct service procedure.
The same habit of preparing before a planned appointment applies in other settings, though the subjects are different: guidance on a heart health checkup covers questions to ask a clinician, while advice on a Paris dinner cruise is about choosing suitable clothing. For a profile of a home cook and her work, see Sakshi Ahluwalia; none of these topics changes the vehicle-specific steps above.
Conclusion
Resetting the engine computer after a repair is best treated as one step in a documented repair process, not as a cure-all. Save diagnostic information, follow the exact vehicle procedure, complete required relearns, and check whether the original fault returns. If the instructions are uncertain or the symptoms persist, pause and get the underlying problem diagnosed.
Frequently Asked Questions
Should I reset the engine computer after every repair?
No. Reset it only when the repair procedure or vehicle service information calls for clearing codes or resetting learned values. Many repairs do not require a reset.
Will clearing a trouble code fix the problem?
No. Clearing a code removes stored information but does not repair the cause. If the fault remains, the code or warning may return.
Is disconnecting the battery a safe way to reset the computer?
Not for every vehicle. Battery disconnection can affect settings and readiness monitors, and it may not perform the function a repair requires. Check the vehicle-specific procedure first.
What information should I save before clearing codes?
Record the diagnostic trouble codes and, when available, freeze-frame data. Also note the symptoms and any scan-tool messages that may help with later diagnosis.
How long does a computer reset take?
The reset itself may be brief, but the full process can take longer if the vehicle requires a calibration, relearn, or readiness-monitor drive cycle. Follow the stated procedure rather than relying on a fixed time estimate.
Why is the check-engine light still on after a reset?
The underlying fault may still be present, or another fault may have been detected. Scan the vehicle, record the new information, and diagnose the cause instead of repeatedly clearing the light.
Can I drive normally after resetting the engine computer?
Only if the vehicle runs safely and the service procedure permits normal driving. Some vehicles need a specific relearn or drive cycle, so follow the manufacturer’s guidance and stop if unsafe symptoms appear.